The Ultimate Guide to Building a Powerful Micro-ATX PC
Introduction
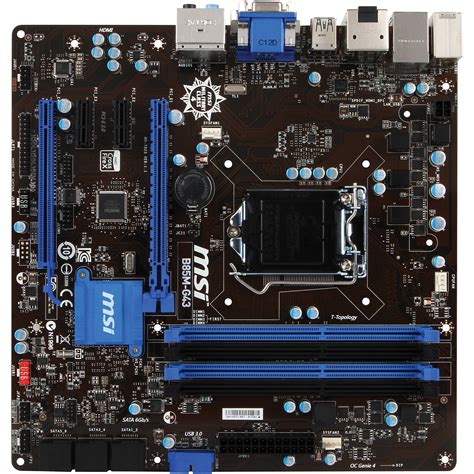
In today's fast-paced world, it's more important than ever to have a powerful and portable computer. Micro-ATX (mATX) motherboards offer the perfect solution, combining the performance of a full-size ATX motherboard with the compact size of a mini-ITX board. In this comprehensive guide, we'll delve into the world of micro-ATX, exploring its benefits, compatibility, and the steps involved in building a high-performance mATX PC.
Benefits of Micro-ATX
-
Compact Size: Compared to ATX motherboards, mATX boards are significantly smaller, making them ideal for small form factor (SFF) builds and space-constrained environments.
-
High Performance: Despite their compact size, mATX motherboards support powerful CPUs, multiple GPUs, and ample storage options.
-
Lower Power Consumption: The reduced size of mATX boards leads to lower power consumption, resulting in improved energy efficiency.
-
Flexibility: mATX boards offer a wide range of features and customization options, allowing for tailored builds to suit specific needs.
Compatibility Considerations
When selecting components for a micro-ATX build, it's crucial to ensure compatibility. Here are some key factors to consider:
-
Case: Choose a case that supports the mATX form factor and has sufficient space for all components.
-
CPU: mATX motherboards support a variety of CPU sockets, such as Intel's LGA1200 and LGA1700, and AMD's AM4 and AM5.
-
GPU: Most mATX motherboards have at least one PCIe x16 slot for a dedicated graphics card.
-
Storage: mATX boards typically offer multiple SATA ports for HDDs and SSDs, as well as an M.2 slot for NVMe drives.
-
Memory: mATX motherboards support dual-channel memory configurations, typically with a maximum capacity of 64GB.
Step-by-Step Guide to Building a Micro-ATX PC
1. Gather Your Components: Collect all necessary components, including the mATX motherboard, CPU, GPU, RAM, storage drives, case, and power supply.
2. Install the CPU: Carefully align the CPU with the socket on the motherboard and gently place it into position. Secure it with the lever or screws.
3. Install the RAM: Open the clips on the RAM slots and insert the memory modules into the correct slots.
4. Mount the Motherboard: Place the motherboard into the case and align it with the standoffs. Secure it with screws.
5. Install the GPU: Insert the graphics card into the PCIe x16 slot and secure it with a retention clip.

6. Install Storage Drives: Connect your HDDs or SSDs to the SATA ports on the motherboard. Insert an NVMe drive into the M.2 slot if desired.
7. Install the Power Supply: Mount the power supply in the designated bay and connect it to the motherboard and all components.
8. Boot and Install Operating System: Turn on the PC and follow the on-screen prompts to install the operating system.
Success Stories
-
Minimalist Masterpiece: A renowned tech enthusiast built a sleek and compact mATX PC for space-saving and mobility. It featured a powerful CPU and GPU, allowing for both productivity and gaming.
-
Gaming Powerhouse: A gamer crafted a mATX PC with a high-end CPU, multiple GPUs, and water cooling. The result was a compact yet formidable gaming machine that could handle the latest titles with ease.
-
Affordable All-Rounder: A college student assembled a budget-friendly mATX PC for general use, including schoolwork, web browsing, and casual gaming. Despite its cost-effective components, it provided excellent performance and efficiency.
What We Learn from These Successes:
- mATX boards allow for powerful and portable PCs without compromising performance.
- Careful component selection and assembly are essential for a successful build.
- mATX PCs can cater to diverse needs, from compact convenience to high-end gaming.
Tips and Tricks
-
Plan Ahead: Determine your specific needs and budget before selecting components.
-
Use a Modular Power Supply: This will simplify cable management and improve airflow within the case.
-
Consider Airflow: Choose a case with ample ventilation and install fans or a liquid cooling system for optimal cooling.
-
Optimize Cable Management: Neatly arrange cables to maximize space and airflow.
-
Update BIOS: Ensure the motherboard's BIOS is up-to-date for compatibility with the latest hardware.
Why Micro-ATX Matters
In an era of rapid technological advancements, the importance of micro-ATX motherboards cannot be overstated. They offer a unique combination of compact size, high performance, and flexibility, enabling users to build powerful PCs that fit their specific needs and environments.
Benefits of Using Micro-ATX
-
Space Saving: mATX motherboards are significantly smaller than ATX boards, making them ideal for SFF builds and constrained spaces.
-
Portability: The compact size and lightweight nature of mATX boards make them a great choice for portable PCs.
-
Energy Efficiency: The reduced size and power draw of mATX boards contribute to improved energy efficiency.
-
Cost-Effectiveness: Compared to ATX motherboards, mATX boards are typically more affordable, making them a budget-friendly option.
-
Wide Compatibility: mATX boards support a wide range of CPUs, GPUs, storage devices, and peripherals.
How Micro-ATX Benefits Specific Users
-
Office Professionals: mATX boards allow for compact and powerful office PCs that can handle demanding tasks, such as data processing and video conferencing.
-
Home Enthusiasts: mATX boards offer a great balance of performance and affordability for home users who want a capable PC for gaming, content creation, and general entertainment.
-
Students: mATX boards provide a cost-efficient and portable solution for students who need a reliable and space-saving PC for coursework and assignments.
-
Travelers: mATX boards are ideal for travelers who require a portable PC that can handle both work and leisure activities.
-
Small Businesses: mATX boards enable small businesses to build compact, low-cost PCs for their office needs.
Tables
Table 1: Comparison of ATX and Micro-ATX Motherboards
| Feature |
ATX |
Micro-ATX |
| Size |
Standard (305 x 244 mm) |
Compact (244 x 244 mm) |
| Expansion Slots |
7-9 PCIe x16 slots |
2-4 PCIe x16 slots |
| Memory Slots |
4-8 DIMM slots |
2-4 DIMM slots |
| Power Draw |
100-250 watts |
60-120 watts |
| Price |
Typically more expensive |
Typically less expensive |
Table 2: Popular Micro-ATX Motherboards
| Manufacturer |
Model |
Chipset |
Features |
| MSI |
MPG B660I GAMING EDGE WIFI |
Intel B660 |
Onboard Wi-Fi 6, Bluetooth 5.2, 2.5 GbE LAN |
| ASUS |
ROG Strix B550-I GAMING |
AMD B550 |
PCIe 4.0 support, 10 GbE LAN, RGB lighting |
| Gigabyte |
Z690I AORUS ULTRA DDR5 |
Intel Z690 |
DDR5 memory support, Thunderbolt 4 support, PCIe 5.0 support |
Table 3: Advantages and Disadvantages of Micro-ATX Motherboards
| Advantages |
Disadvantages |
| Compact size |
Limited expansion slots |
| Lower power draw |
Fewer DIMM slots |
| Flexibility |
Thermal challenges in some cases |
| Affordability |
May not support high-end components |

