Laptop SATA Slot Replacement: A Comprehensive Guide to Restore Data Access
Replacing a faulty SATA slot in a laptop can be a daunting task, but it's essential for restoring data access and keeping your device running smoothly. This comprehensive guide will equip you with the knowledge and step-by-step instructions to navigate this repair process like a pro.
What is a SATA Slot?
Serial ATA (SATA) is an interface used to connect storage devices like hard disk drives (HDDs) and solid-state drives (SSDs) to computers. SATA slots are found in most laptops and allow you to connect and access these storage devices.
Signs of a Faulty SATA Slot
A faulty SATA slot can manifest itself in several ways:
-
No access to storage devices: Your laptop may not recognize or access HDDs or SSDs connected to the affected slot.
-
Blue Screen of Death (BSOD): You may encounter a BSOD with errors related to storage device detection or access.
-
Slow performance: Data transfer rates may be significantly reduced when using storage devices connected to the faulty slot.
-
Overheating: The laptop may overheat due to issues with the SATA controller or slot.
-
Loud noises: You may hear unusual clicking or grinding noises when accessing storage devices connected to the affected slot.
When to Replace a SATA Slot
Replacing a SATA slot is necessary when the issue cannot be resolved by other means, such as:

- Updating the BIOS or chipset drivers
- Reseating the storage device
- Running system diagnostics
Step-by-Step SATA Slot Replacement Guide
Disclaimer: Before proceeding, back up your important data and disconnect your laptop from all power sources.
Tools and Materials Required:
- Anti-static wrist strap
- Phillips head screwdriver
- Torx screwdriver (if applicable)
- Replacement SATA slot
- Soft cloth
Instructions:
1. Safety Precautions:

- Wear an anti-static wrist strap to prevent electrostatic discharge (ESD) damage to components.
- Power down your laptop and disconnect the battery.
2. Remove the Back Panel:
- Use a screwdriver to remove the screws holding the back panel in place.
- Gently lift the back panel and set it aside.
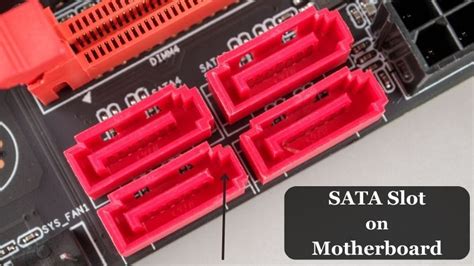
3. Locate the SATA Slot:
- The SATA slot is usually located on the motherboard, near the storage device bays.
- It's a thin, rectangular connector with several pins.
4. Disconnect the SATA Cables and Storage Device:
- Gently disconnect the SATA cables and storage device from the faulty slot.
5. Remove the Screws and Slot:
- Use a screwdriver to remove the screws securing the SATA slot to the motherboard.
- Carefully remove the faulty slot from its socket.
6. Install the New Slot:
- Align the replacement SATA slot with the socket on the motherboard.
- Press it down gently until it clicks into place.
- Secure the slot with the screws.
7. Reconnect the SATA Cables and Storage Device:
- Reconnect the SATA cables and storage device to the new slot.
- Make sure the connections are secure.
8. Assemble the Laptop:
- Replace the back panel and secure it with screws.
- Reconnect the battery and power on the laptop.
Troubleshooting Post-Replacement
If your laptop doesn't boot up properly or you still encounter issues with storage access, try the following:
- Check the SATA cable connections.
- Reseat the storage device in the SATA slot.
- Run system diagnostics to identify any underlying hardware issues.
Pros and Cons of Replacing a SATA Slot
Pros:
- Restores data access and allows use of storage devices
- Improves laptop performance
- Reduces potential for data loss
- Enhances system stability
Cons:
- Can be a challenging repair for beginners
- Requires specialized tools and materials
- May void the laptop's warranty if performed outside authorized channels
- Potential for additional damage if not done correctly
FAQs
1. How long does it take to replace a SATA slot?
- The repair time can vary depending on the laptop model and your skill level, but it generally takes 30-60 minutes.
2. How much does it cost to replace a SATA slot?
- The cost of a replacement SATA slot can range from $30 to $100, depending on the model and brand.
3. Can I use a SATA slot from a different laptop?
- It's not recommended as SATA slots can vary in compatibility between different laptop models.
4. Do I need to format the storage device after replacing the SATA slot?
- No, formatting is not necessary unless the storage device has been corrupted or damaged.
5. What happens if I break the SATA slot during replacement?
- If you damage the SATA slot beyond repair, you will need to replace the entire motherboard.
6. How can I prevent SATA slot damage?
- Handle storage devices and SATA cables with care.
- Avoid overtightening screws when securing the SATA slot.
- Keep your laptop clean and free of dust and debris.
Call to Action
If you're experiencing issues with your SATA slot and suspect it needs replacement, don't hesitate to consult a qualified technician. Replacing a SATA slot can help you restore data access, improve laptop performance, and ensure long-term reliability.

