The Ultimate Guide to Drill Point Countersinks: Precision and Efficiency for Your Projects
Countersinks are essential tools for creating clean, precise countersunk holes for screws, rivets, or other fasteners. Among the various types available, drill point countersinks stand out for their versatility and efficiency. This comprehensive guide will delve into the world of drill point countersinks, providing valuable information to help you choose the right tool for your needs and master the art of countersinking.
Understanding Drill Point Countersinks
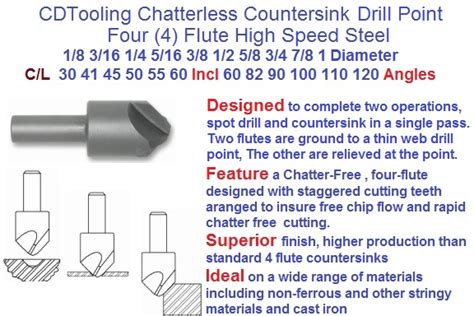
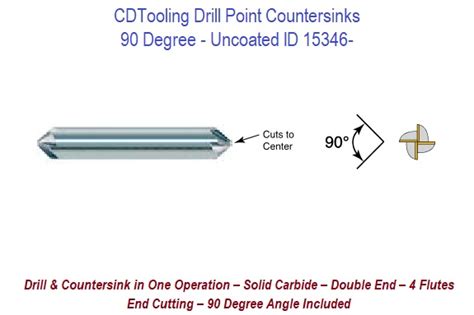
Drill point countersinks are distinguished by their unique design, which combines a drill bit with a countersink cutter. This allows for simultaneous drilling and countersinking operations, saving time and effort. They typically feature a carbide-tipped cutting head for superior durability and performance.
Key Features of Drill Point Countersinks
-
All-in-one tool: Combines drilling and countersinking capabilities.
-
Precise and clean: Provides consistent countersink depths for secure fastener seating.
-
Reduced vibration: Balanced design minimizes chatter and vibrations during use.
-
Durability: Carbide-tipped cutting head ensures longevity and resistance to wear.
-
Versatility: Accommodates a wide range of materials, including metal, plastic, and wood.
Choosing the Right Drill Point Countersink
Selecting the appropriate drill point countersink is crucial for optimizing performance and achieving desired results. Consider these factors:
-
Material type: Choose a countersink specifically designed for the material you're working with.
-
Hole diameter: Match the countersink size to the diameter of the fastener or screw you're using.
-
Countersink depth: Determine the required countersink depth based on the fastener head size and material thickness.
-
Cutting angle: The cutting angle determines the countersink angle, which should complement the fastener head for a perfect fit.
-
Shank diameter: Select a countersink with a shank diameter that fits your drill chuck or driver.
Guide to Using Drill Point Countersinks
To effectively use drill point countersinks, follow these steps:
-
Clamp or secure the workpiece: Ensure the material is securely held in place to prevent movement during drilling and countersinking.
-
Select the correct countersink: Choose the appropriate countersink for the material, hole diameter, and countersink depth.
-
Set the drill depth: Adjust the drill depth stop to the desired countersink depth or slightly below the top surface of the material.
-
Lubricate: Apply a few drops of cutting oil or lubricant to the countersink tip to reduce friction and extend tool life.
-
Drill and countersink: Hold the drill perpendicular to the workpiece and apply steady pressure while drilling and countersinking simultaneously.
-
Remove chips: Periodically clear away metal chips from the countersink to maintain cutting efficiency.
-
Inspect: Once the hole is complete, inspect the countersink to ensure it's clean and burr-free.
Common Mistakes to Avoid
To prevent damage or subpar results, avoid these common mistakes when using drill point countersinks:
-
Over-countersinking: Avoid countersinking too deeply, as this can weaken the material and compromise the fastener hold.
-
Incomplete countersinking: Ensure the countersink reaches the desired depth to allow the fastener head to sit flush with the surface.
-
Using dull or damaged countersinks: Dull or damaged countersinks can produce rough or uneven finishes and reduce accuracy.
-
Applying excessive pressure: Excessive pressure can cause the countersink to bind or break, leading to tool damage and material deformation.
-
Not securing the workpiece: Unsecured workpieces can move during drilling and countersinking, resulting in imprecise holes.
Tips and Tricks
Mastering the art of countersinking with drill point countersinks requires both skill and technique. Here are some tips to enhance your efficiency:

-
Use a pilot hole: Start with a pilot hole slightly smaller than the countersink diameter to guide the tool and prevent wandering.
-
Lubricate regularly: Apply cutting oil or lubricant frequently to reduce friction, extend tool life, and improve surface finish.
-
Sharpen countersinks: Regularly sharpen dull countersinks using a diamond hone or countersink sharpener to maintain optimal cutting performance.
-
Practice on scrap material: Before working on critical parts, practice on scrap material to familiarize yourself with the process and ensure accurate results.
-
Use a step countersink: Consider using a step countersink to create multiple countersink sizes in a single operation, saving time and effort.
Stories and What We Learn
Story 1: A DIY enthusiast attempted to countersink holes for a bookshelf project but ended up with uneven and oversized countersinks due to using a dull countersink and applying excessive pressure.
Lesson: Always use sharp countersinks and avoid over-countersinking.
Story 2: A carpenter was countersinking holes for a wooden cabinet door and neglected to secure the workpiece. As a result, the door moved during drilling, resulting in misaligned screw holes.
Lesson: Never compromise on workpiece security while drilling or countersinking.
Story 3: A manufacturer experienced premature wear and breakage of drill point countersinks. Investigation revealed that the countersinks were not lubricated properly, causing excessive friction and heat buildup.
Lesson: Regular lubrication is essential for extending countersink life and optimizing performance.
Why Drill Point Countersinks Matter
Drill point countersinks are not just tools; they play a crucial role in ensuring the integrity and aesthetics of your projects. Here are some key reasons why they matter:
-
Precision: Drill point countersinks provide precise countersink depths and hole diameters, ensuring secure and flush fastener seating.
-
Efficiency: They combine drilling and countersinking into a single operation, saving time and effort compared to using separate tools.
-
Quality: Carbide-tipped cutting heads produce clean and burr-free countersinks, enhancing the overall finish of your workpieces.
-
Versatility: Drill point countersinks accommodate a wide range of materials and hole sizes, making them suitable for various applications.
-
Durability: Constructed with durable materials like carbide, they withstand heavy-duty use and maintain their cutting edge for extended periods.
Benefits of Using Drill Point Countersinks
Investing in quality drill point countersinks offers numerous benefits:
-
Improved fastener seating: Precise countersinks allow fasteners to sit flush with the surface, preventing protruding heads that can snag or cause discomfort.
-
Reduced stress on materials: By distributing the load over a larger surface area, countersinking reduces stress on the material around the fastener, minimizing the risk of cracking or deformation.
-
Enhanced aesthetics: Clean and uniform countersinks improve the overall appearance of your projects, whether they are furniture, cabinets, or metal structures.
-
Faster project completion: The streamlined drilling and countersinking process saves time and allows you to complete tasks efficiently.
-
Reduced material waste: Drill point countersinks eliminate the need for separate drilling and countersinking operations, minimizing material waste and maximizing cost-effectiveness.
Tables
Table 1: Recommended Countersink Hole Depth for Common Fastener Head Types
| Fastener Type |
Countersink Depth |
| Flat head |
1/2 fastener head diameter |
| Round head |
1/4 fastener head diameter |
| Oval head |
1/3 fastener head diameter |
| Pan head |
1/5 fastener head diameter |
| Truss head |
1/6 fastener head diameter |
Table 2: Typical Countersink Sizes for Various Materials
| Material |
Nominal Hole Diameter |
Countersink Size |
| Softwood |
1/4" - 1/2" |
1/8" - 1/2" |
| Hardwood |
1/8" - 3/8" |
1/8" - 1/4" |
| Metal |
1/8" - 1" |
1/8" - 1/2" |
| Plastic |
1/8" - 1/2" |
1/8" - 1/4" |
Table 3: Countersink Head Styles and Applications
| Head Style |
Applications |
| 90° |
General-purpose countersinking |
| 100° |
For countersinking below the surface with flat head screws |
| 110° |
For countersinking below the surface with oval head screws |
| 120° |
For countersinking below the surface with round head screws |
| 135° |
For countersinking below the surface with specialized fasteners |

