Needle Bearing Puller: A Comprehensive Guide
Needle bearings are essential components in various industries, including automotive, aerospace, and manufacturing. They are known for their high load capacity, low friction, and compact size. However, removing needle bearings from shafts or housings can be a challenging task, especially when they are tightly fitted or corroded. This is where a needle bearing puller comes into play.
Understanding Needle Bearing Pullers
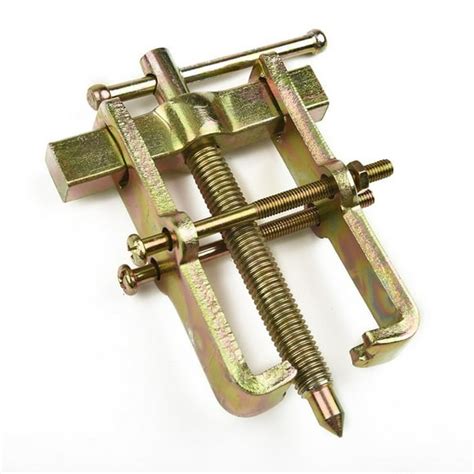
A needle bearing puller is a specialized tool designed to safely and efficiently remove needle bearings from their respective locations. It consists of a sturdy frame, a hydraulic or mechanical jack, and a set of jaws or claws that grip the bearing. The puller's operation is based on applying controlled force to extract the bearing without causing damage to the surrounding components.
Types of Needle Bearing Pullers
There are two main types of needle bearing pullers:
-
Hydraulic Pullers: These pullers utilize a hydraulic jack to generate the necessary force to extract the bearing. They offer high pulling capacity and are suitable for removing large or tightly fitted bearings.

-
Mechanical Pullers: These pullers use a mechanical screw or lever mechanism to generate the required force. They are typically smaller and more portable than hydraulic pullers and are ideal for removing smaller or less tightly fitted bearings.
How to Use a Needle Bearing Puller
Using a needle bearing puller efficiently requires careful preparation and execution. Here's a step-by-step guide:

-
Safety First: Always wear appropriate safety gear, including gloves and eye protection, before operating the puller.
-
Prepare the Bearing: Clean the area around the bearing to remove any dirt or debris. If necessary, apply a penetrating lubricant to loosen the bearing from its seat.
-
Choose the Right Puller: Select a puller that is appropriate for the size and type of bearing you need to remove.
-
Position the Puller: Carefully position the puller's jaws or claws around the bearing. Ensure that the jaws are securely gripping the bearing.
-
Apply Force: Slowly and steadily apply force to the puller's jack or lever. Monitor the bearing as it gradually comes loose.
-
Remove the Bearing: Once the bearing is completely removed, release the force from the puller and carefully slide the bearing off the shaft or housing.
Tips and Tricks
- Use a bearing separator to create a gap between the bearing and its seat before using the puller.
- Apply heat to the bearing to expand it and loosen its grip.
- If the bearing is particularly stubborn, try tapping the puller's jaws or claws lightly with a hammer.
- Always inspect the bearing and its surrounding components for any damage after removal.
Common Mistakes to Avoid
-
Overtightening the Jaws: Avoid overtightening the puller's jaws as this can damage the bearing or its seat.
-
Applying Excessive Force: Do not apply excessive force to the puller as this can break the bearing or the puller itself.
-
Using an Incorrect Puller: Always use a puller that is specifically designed for the type and size of bearing you need to remove.
-
Skipping Safety Measures: Never operate a needle bearing puller without wearing appropriate safety gear.
Interesting Stories
-
The Case of the Stuck Bearing: A mechanic was tasked with removing a needle bearing from a transmission. Despite using a large hydraulic puller, the bearing refused to budge. Frustrated, the mechanic resorted to tapping the puller's jaws lightly with a hammer. To his surprise, the bearing came loose with a single tap.
-
The Triumph of Teamwork: A team of engineers was struggling to remove a large needle bearing from a turbine shaft. They tried various pullers without success. Finally, they decided to use two pullers simultaneously, each pulling from opposite sides of the bearing. The combined force successfully extracted the bearing.
-
The Corrosion Conundrum: A maintenance technician was attempting to remove a needle bearing that had become corroded over time. The puller's jaws were unable to grip the bearing securely due to the corrosion. The technician applied penetrating lubricant to loosen the bearing and then used a bearing separator to create a gap between the bearing and its seat. With these steps, the bearing was eventually removed without damage.
FAQs
Q1. What is the difference between a hydraulic and a mechanical needle bearing puller?
A: Hydraulic pullers use a hydraulic jack to generate force, while mechanical pullers use a screw or lever mechanism.
Q2. How do I choose the right needle bearing puller?
A: Consider the size, type, and condition of the bearing you need to remove.
Q3. How do I prevent damage to the bearing or its surrounding components?
A: Use a bearing separator to create a gap, apply heat to expand the bearing, and avoid excessive force.
Q4. What are some common mistakes to avoid when using a needle bearing puller?
A: Overtightening the jaws, applying excessive force, using an incorrect puller, and skipping safety measures.
Q5. What should I do if the bearing is particularly stubborn?
A: Try tapping the puller's jaws lightly with a hammer or applying penetrating lubricant.
Q6. How do I know if I'm using too much force?
A: If the puller is struggling to move the bearing or if you hear cracking noises, you may be applying excessive force.
Call to Action
If you need to remove a needle bearing safely and efficiently, using a needle bearing puller is essential. By following the steps outlined in this guide, using the tips and tricks provided, and avoiding common mistakes, you can successfully extract the bearing without causing any damage. Remember to always prioritize safety and choose the appropriate puller for the job.

